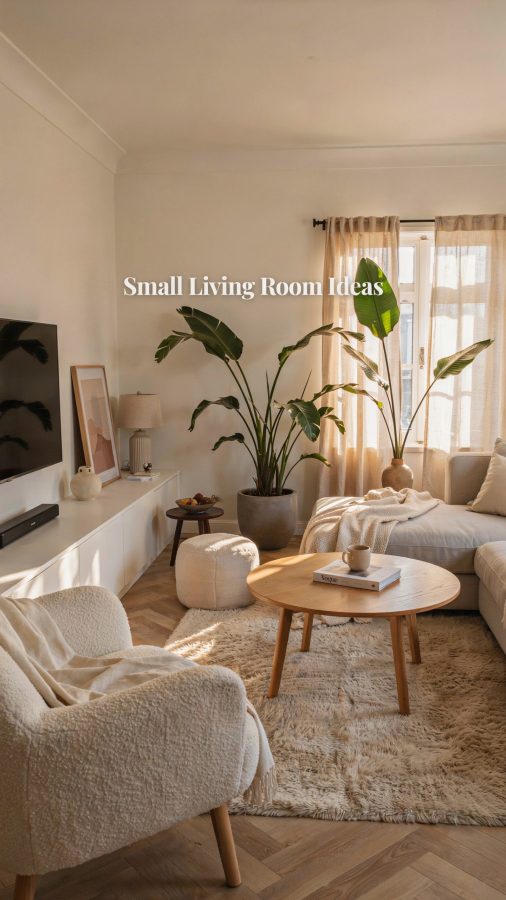
If you have a small living room that flows straight into your dining area, you already know the struggle of making it feel spacious without losing function. I have lived with this exact layout for years, and I learned that small living room ideas work best when you commit to a neutral modern minimalist approach. By sticking to soft earth tones, sleek furniture, and a smart open plan, you can trick the eye into seeing a bigger, calmer space. Today I am sharing the exact steps I used to transform my own cramped floor plan into a room that breathes.
Step 1: Choose a Neutral Color Palette for Visual Flow
When your living room and dining area share one open space, color is your best friend. A neutral palette ties everything together so your eye glides from the sofa to the table without a harsh break. I went with warm white walls, a beige sofa, and light wood floors. This creates a blank canvas that feels airy and clean.
Stick to shades of cream, taupe, grey, and muted beige. Avoid pure white if your room gets north-facing light, it can look cold. Instead, choose a slightly warm off-white like “Swiss Coffee” or “Natural Linen.” For your dining chairs or sideboard, pick a tone that is a few shades darker than your walls. This adds depth without shouting.
Here is a quick list of my go-to neutral paint colors for small open concept rooms:
- Benjamin Moore “Revere Pewter” (a soft greige that works everywhere)
- Sherwin Williams “Agreeable Gray” (warm without being yellow)
- Farrow and Ball “School House White” (creamy and forgiving)
- Behr “Natural Wicker” (a light beige with a hint of warmth)
Paint your ceiling the same color as your walls. That eliminates the visual line that tells your brain “the room ends here.” It seriously makes the space feel taller.
Step 2: Select Multipurpose Furniture to Save Space
In a small living room with an open dining area, every piece of furniture has to earn its keep. I learned this the hard way after hauling a giant sectional into my first apartment. Now I choose pieces that serve double duty. For example, my coffee table has a lift top so I can eat dinner there when I want a break from the dining table. It also holds baskets for blankets and remotes.
Your sofa should be low and arms-free, or at least have slim arms. A low profile keeps the sightline open so you can see the dining area from the living zone. Pair it with a slim console table behind the sofa to define the boundary without blocking the view. That console can also act as a buffet during meals.
For the dining side, pick a table with a pedestal base instead of four legs. Pedestal tables take up less visual space and let you squeeze in an extra chair when company comes. And look for nesting side tables or stools that can slide under the console when not in use. Every square inch counts.
Step 3: Define Zones Without Walls
You do not need a wall to separate your living room from your dining area. In fact, walls make a small space feel smaller. Instead, use furniture placement, rugs, and light to create distinct zones. I placed a large flatweave rug under my sofa and coffee table, leaving the dining area on bare wood floor. That simple change told my brain “this is the living room corner” without any barriers.
Another trick is to angle your sofa away from the dining table. If you push everything against the walls, you get a bowling alley effect. Pull the sofa slightly forward and put a slim console behind it. That creates a natural hallway behind the sofa and gives the dining area its own pocket.
Use pendant lights or a semi-flush mount fixture over the dining table to anchor that zone visually. Keep the living area lit with floor lamps and sconces. Different ceiling heights for lights also help: hang the dining fixture lower, about 30 inches above the table. That draws the eye down and makes the table feel like its own room.
Step 4: Keep Surfaces Clear and Clutter Hidden
Minimalism is not about owning nothing. It is about showing very little. I am a messy person by nature, so I had to build systems that hide my chaos. My coffee table has a hidden storage compartment inside the lift top. My TV console has closed cabinets for electronics and cords. My dining sideboard has baskets for napkins, mail, and extra placemats.
Every surface in a small open concept room becomes a stage. If you pile books, remotes, coasters, and keys on the coffee table, the room instantly feels cluttered and cramped. I keep one decorative tray on the coffee table with a small plant or a candle. That is it. Everything else lives inside furniture or in a decorative box.
For the dining table, resist the urge to use it as a drop zone. I made a rule: nothing stays on the table except a centerpiece when we are not eating. That centerpiece should be low and simple, like a ceramic bowl or a short vase. Tall floral arrangements block sightlines and make the ceiling feel lower.
Step 5: Use Lighting to Create Separation and Depth
Lighting is the cheapest way to make a small living room feel bigger and more defined. In an open concept space, you need at least three light sources per zone. I use a dimmable overhead fixture in the dining area, a floor lamp next to the sofa, and a table lamp on the console behind the sofa. That is six light sources total, but they all serve a purpose.
Warm light (2700K to 3000K) makes neutrals look cozy and inviting. Cool light washes them out and feels sterile. I replaced all my bulbs with warm LED dimmers so I can adjust the mood. For the dining area, a pendant light with a linen shade diffuses light softly. For the living area, a floor lamp with a white or cream shade bounces light off the ceiling and walls.
Another trick: place a mirror on the wall opposite a window. It reflects natural light into the dining area and makes the whole room feel twice as wide. I hung a large round mirror behind my dining table, and it honestly changed everything. No more dark corners.
Step 6: Add Texture Without Adding Visual Weight
Neutral rooms can feel flat if you do not mix textures. But you have to be careful: too many chunky knits or thick materials eat up visual space. I stick to lightweight textures like linen, cotton, and sleek wood. My sofa is upholstered in a performance linen blend. The throw pillows are a mix of smooth velvet and nubby cotton. The rug is a low-pile wool with a subtle pattern.
On the dining side, I chose matte ceramic for the tableware and a light wood table top. The chairs have woven rattan backs, which add warmth without bulk. Rattan and cane are great for small spaces because they are visually porous, your eye passes through them instead of stopping at a solid block.
Do not forget wall texture. A simple shiplap accent wall or a textured wallpaper in a neutral tone adds interest without taking up floor space. I put a peel-and-stick grasscloth wallpaper on the wall behind my sofa. It cost about $40 and took an hour. It adds enough texture to keep the room from feeling sterile.
Step 7: Scale Down Decor and Embrace Negative Space
This is the hardest step for many people, including me. We want to fill every shelf and corner with pretty things. But in a small open concept room, empty space is your most valuable asset. I learned to love blank walls and bare tabletops. Leave 30 to 40 percent of your surfaces completely empty. That makes the room look curated, not cluttered.
Choose one or two large decor items per zone instead of many small knickknacks. In my living area, I have a single large piece of art above the sofa and a tall snake plant in the corner. That is it for decor. On the dining side, I hung a simple round mirror and put a wooden bowl on the table. No gallery walls, no shelf full of trinkets.
For curtains, go floor to ceiling and choose a light, airy fabric. I use off-white linen curtains that hang high and wide so the window looks bigger. When they are open, they stack neatly without blocking light. Avoid heavy drapes or dark colors in a small neutral room. They absorb light and shrink the space.
One more thing: keep the floor clear. No plants on the floor, no baskets shoved against the wall except maybe one for throws. The more floor you can see, the larger the room feels. I store my extra dining chairs in a closet when not in use. It sounds extreme, but I would rather have open space than a crowded room.
These seven steps turned my awkward, cramped open concept space into a calm, functional home. It did not happen overnight. I tried a few different rug placements and swapped out lamps until I found the right combo. But the core principle stayed the same: choose neutral tones, pick furniture that works hard, and leave plenty of breathing room.
If you are ready to try this approach, start with the color palette. Paint is cheap and quick, and it sets the tone for everything else. Then edit your furniture down to the essentials. You might be surprised how much better your small living room feels when you stop fighting the size and start working with it.
Save this guide for your next weekend project and share your own before and after photos. I would love to see how your neutral modern minimalist living room turns out.
#smalllivingroomideas #neutrallivingroom #minimalistlivingroom #moderninteriordesign #modernlivingroom
Leave a Comment