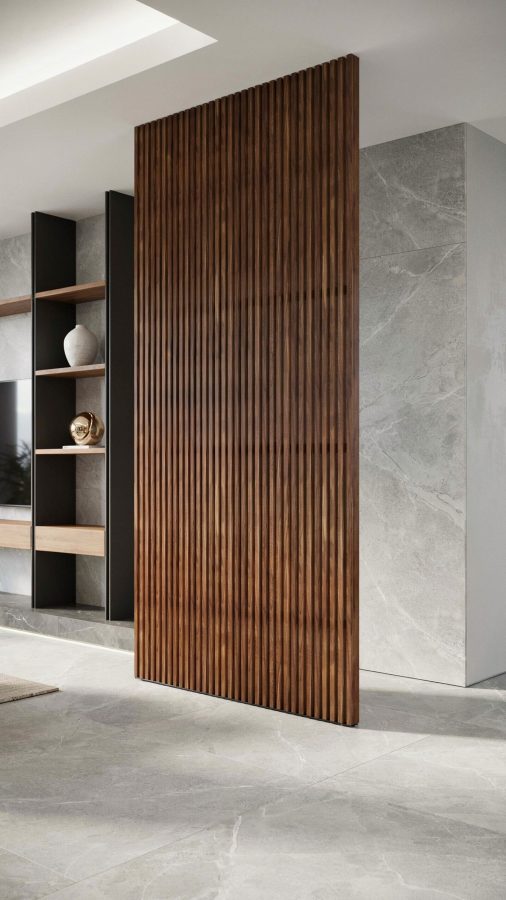
If your bathroom is squeezed into a tight corner or you simply hate the way a standard swing door eats up floor space, a ghost sliding door might be exactly what you have been looking for. This invisible entry system sits flush with the wall, has no visible frame, and disappears into a pocket when open, making it one of the smartest space saving decor ideas I have come across. I installed one in my own guest bath last year, and it completely changed how the room feels, so let me walk you through the process step by step.
What Makes a Sliding Door for Bathroom Spaces So Different
A standard sliding door for bathroom use usually rides on an exposed track and has a handle that sticks out. A ghost system hides all of that. The track is recessed into the ceiling or the wall cavity, and the door panel itself sits flush with the drywall on both sides. You get a clean, uninterrupted surface that looks more like a wall panel than a doorway.
Because there is no handle or visible frame, the door becomes almost invisible when closed. This is especially useful in small powder rooms or en suites where you do not want the door to visually clutter the space. The mechanism uses a top hung roller system that glides inside a concealed header, so the only thing you see is a narrow slit at the top of the door opening.
I personally love that it eliminates the need for a door stop. With a regular door you have to account for the swing arc, but a ghost door simply slides into the wall pocket and stays there. That alone frees up about 10 to 12 inches of usable floor area in a typical bathroom layout.
How a Hidden Bathroom Door Works Without a Visible Frame
The trick behind a hidden bathroom door is the pocket assembly. This is a metal or wood framed box that gets installed inside the wall cavity during construction or renovation. The door panel slides into this pocket, so when it is open the panel is completely hidden between the studs.
You do not need a traditional door jamb either. Instead, the opening is framed with a simple drywall return or a minimal metal trim that matches the wall finish. The door itself is usually a rebated panel, meaning the edges are stepped so they overlap the opening slightly without needing a casing.
For privacy, you can add a magnetic catch or a bottom bolt lock that engages silently. Many ghost systems also use soft close hardware, so the door glides shut without slamming. I recommend testing the magnetic hold strength before final installation, because a weak magnet can allow the door to drift open in a humid bathroom.
Measuring Your Space for an Invisible Door Installation
Before you buy anything, you need to figure out if your wall can accommodate a pocket system. The pocket needs to be roughly twice the width of the door panel plus about an inch for the hardware. For a standard 30 inch door, you need a pocket that is at least 61 inches wide inside the wall.
Check that the wall is non load bearing or that you have approval to modify a load bearing wall. You also need enough depth. Standard 2×4 walls are 3.5 inches deep, which is usually enough for a single pocket. For thicker doors or soundproofing layers, you might need a 2×6 wall.
- Measure the rough opening height. Most ghost doors need a minimum header height of 82 inches to accommodate the track system.
- Account for floor clearance. The bottom of the door should sit about 0.5 to 0.75 inches above the finished floor to avoid scraping tile or transitions.
- Check for obstructions. Electrical wires, plumbing vents, or outlet boxes inside the pocket area will need to be relocated before you frame the cavity.
- Plan for the backstop. The pocket needs a solid back wall or a stop block to prevent the door from sliding too far in.
I made the mistake of assuming my wall was clear, only to find a vent pipe running right through the middle. It added two days to the project. Save yourself the headache and use a stud finder and a borescope if you have one.
Choosing the Right Hardware for a Ghost Sliding Door System
Not all ghost door hardware is created equal. You want a system that uses a top hung mechanism with a sealed bearing roller, not a bottom roller. Bottom rollers tend to collect dust and hair, and they require a floor track that ruins the invisible look.
Look for hardware that includes a soft close module and a magnetic strike plate. The soft close prevents the door from banging into the pocket frame, and the magnet keeps it from rattling when the bathroom fan is on. I went with a brand that uses a nylon roller wheel, which is quieter than metal on metal.
Pay attention to the weight rating. A solid core door for a bathroom might weigh 80 to 100 pounds, so your hardware should be rated for at least 120 pounds to be safe. If you are using a hollow core door, you can go lighter, but hollow doors feel flimsy in a bathroom and offer poor sound insulation.
You also need to decide on a handle or lack thereof. Most ghost doors use a recessed pull or a finger notch cut into the edge of the door. I used a slim aluminum pull that is painted the same color as the wall, so it blends in but still gives you something to grip.
Step by Step Installation Guide for a Hidden Bathroom Entry
I am going to walk you through the install the way I did it in my own home. This assumes you have basic carpentry skills and a helper, because the door panel is awkward to handle alone.
Step 1: Frame the pocket. Remove the drywall from the wall where the pocket will go. Build a box using 2×4 lumber that is the exact width and height of your door plus the track housing. The header beam needs to be level and securely fastened to the ceiling joists or a structural beam above.
Step 2: Install the track. Mount the top track inside the pocket header. Use a laser level to make sure it is perfectly horizontal. Even a 1/8 inch tilt will cause the door to drift or scrape the floor.
Step 3: Hang the door. Attach the roller carriers to the top of the door panel. Slide the carriers into the track and test the movement. Adjust the height using the leveling screws on the carriers until the door hangs evenly with a consistent gap at the bottom.
Step 4: Install the pocket stops. Place a rubber or metal stop at the back of the pocket so the door does not hit the wall at full open. Install another stop at the front of the pocket to prevent the door from pulling out of the track when closed.
Step 5: Finish the drywall. Reattach drywall around the pocket opening, leaving the door itself exposed. Tape and mud the seams so the pocket area blends seamlessly with the surrounding wall. The gap between the door and the wall should be about 1/8 inch, which gets covered by a thin drywall return or a metal edge trim.
Step 6: Add the pull and privacy lock. Install your recessed pull or finger notch. For the lock, I used a small magnetic catch that engages when the door is fully closed. No visible latch or keyhole needed.
Step 7: Paint and blend. Paint the door the exact same color as the wall. If you use a matte finish, the door becomes nearly invisible when closed, especially under dim bathroom lighting.
Styling Your Bathroom Decor Around a Seamless Sliding Door
Once the door is installed, you want the rest of your bathroom decor to support the minimalist look. A ghost door stands out the most when the surrounding walls are clean and uncluttered. Busy wallpaper or large tile patterns right next to the door can break the illusion of invisibility.
I kept the wall opposite the door completely bare except for a small sconce. The continuous surface of the closed door acts like a blank canvas, so it actually makes the room feel larger. If you have a mirror or shelving unit nearby, make sure it does not protrude into the door path when the door slides open.
For the floor, choose a material that flows under the door without a threshold. Large format tile or continuous hardwood works well. If you need a transition strip, use a flat Schluter profile in a color that matches the flooring, not a bulky T molding.
Lighting is another factor. A ghost door looks best when the wall wash light is even. Recessed cans or a linear LED strip along the ceiling line helps the door surface read as a solid wall rather than a panel with edges.
Common Mistakes to Avoid with Pocket and Sliding Door Systems
I have seen a few installations go sideways, and most of the problems come down to planning. One big mistake is forgetting to account for the door thickness when framing the pocket. A standard interior door is 1.375 inches thick, but if you add a soundproofing layer or a tile backer, the pocket needs to be wider.
Another issue is the floor gap. If you set the door too low, it will scrape the tile when the humidity swells the wood. If you set it too high, you see a big shadow line at the bottom that breaks the invisible effect. I aim for a 5/8 inch gap and use a floor seal brush strip if I need better sound blocking.
People also underestimate how much the wall will flex. A pocket door system relies on a rigid header. If the header is not properly supported, the track can shift over time and the door will start rubbing. Use 2×6 lumber for the header even if the wall is 2×4, and add blocking at the top of the pocket.
Finally, do not skip the soft close module. A ghost door that slams into the back of the pocket sounds terrible and can crack the drywall seam over time. The soft close costs around 40 dollars and takes ten minutes to install. It is worth every penny.
I have been using my ghost sliding door for about 14 months now, and it still feels like a small magic trick every time I close it. The room looks clean, the floor space is usable, and guests often ask where the door went. If you are willing to do a bit of framing and drywall work, this is one of the most rewarding upgrades you can make in a small bathroom. Start by checking your wall cavity depth and ordering a hardware kit that matches your door weight. The rest is just careful measuring and a little patience.
#ghostslidingdoor #hiddenbathroomdoor #invisibledoor #slidingdoorbathroom #bathroomdecor
Leave a Comment